How to Send Your First Lead
You just finished a job and the homeowner asks "know any good roofers?" Instead of just handing out a name, send that referral through LeadChuck and earn money when they accept it. Here's exactly how.
Before You Can Send
Two things need to be done first:
- Identity verification — Photo ID + selfie through Stripe. Takes about 2 minutes.
- Bank account connected — So you can get paid when your lead is accepted.
Both of these show as green checkmarks on your profile. If they're not green, go to Settings and knock them out. You can't send (or receive) leads without them.
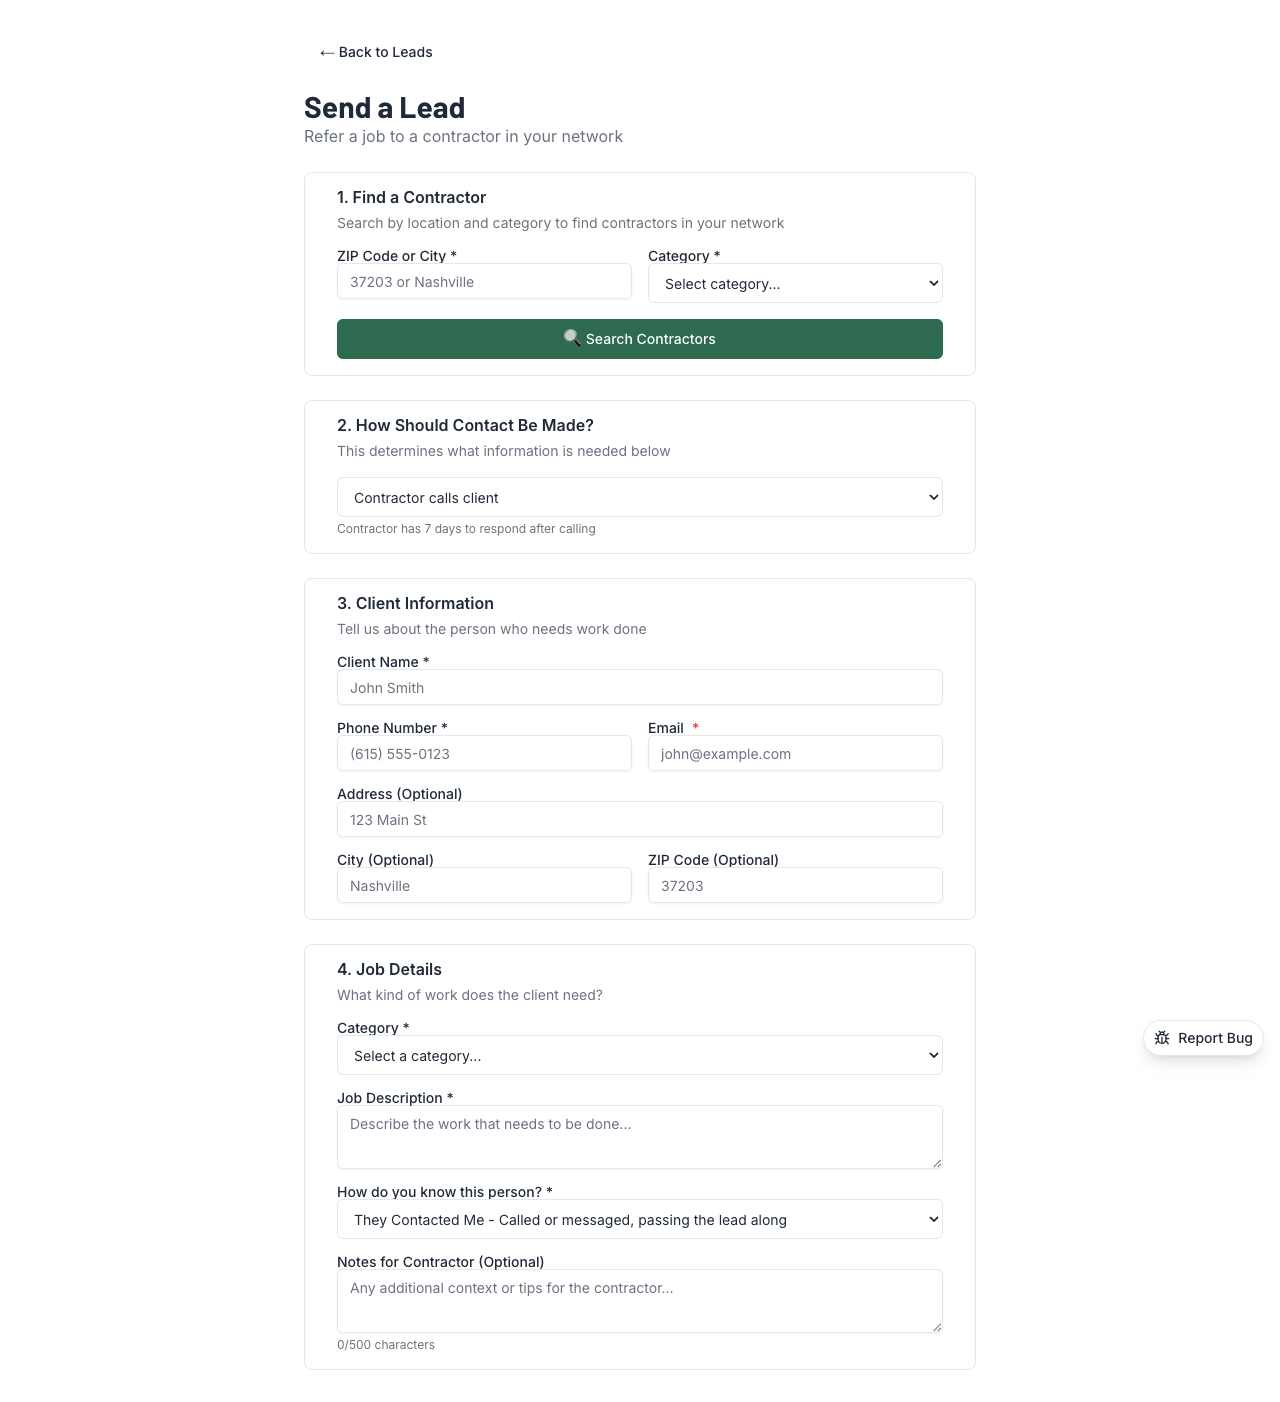
Step-by-Step Walkthrough
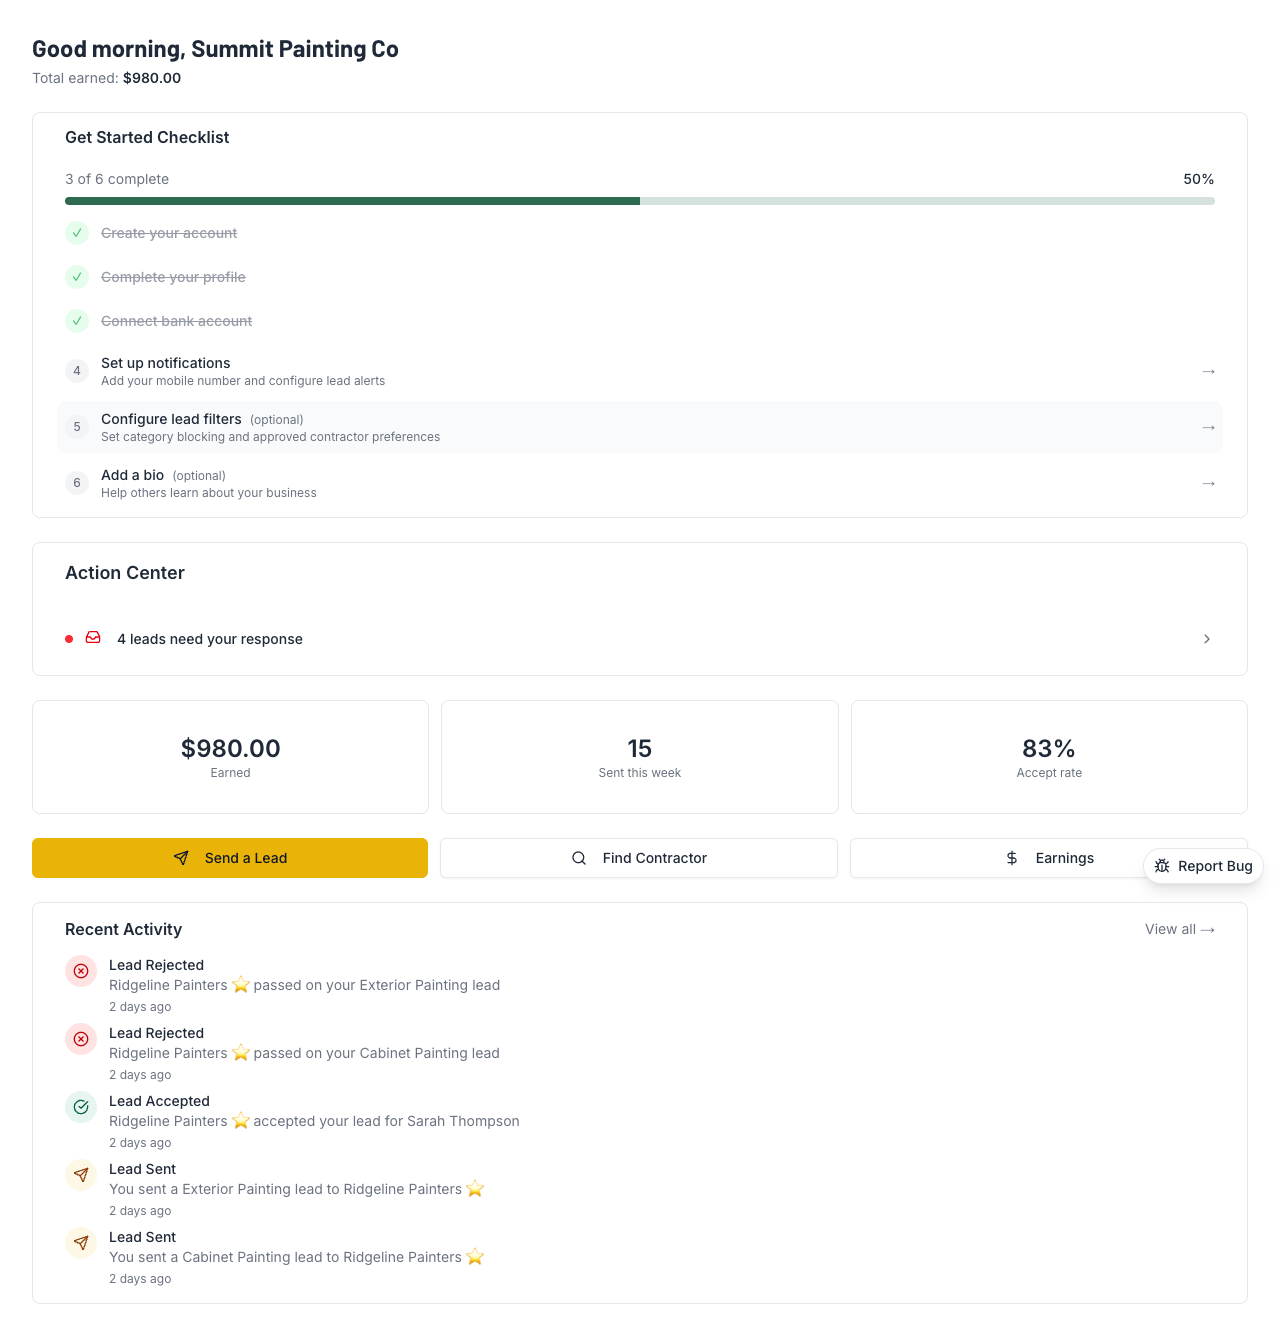
1. Click "Send a Lead"
From your dashboard, hit the big yellow "Send a Lead" button. Hard to miss.
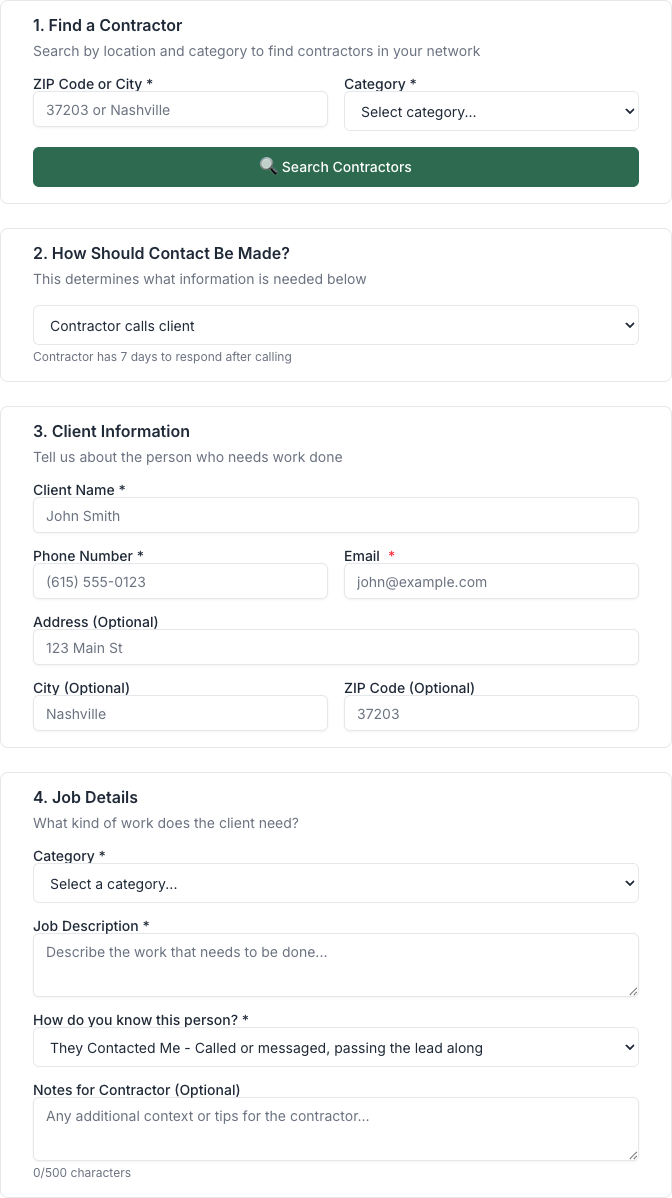
2. Find a Contractor
Enter the ZIP code or city where the job is, and pick the category(roofing, plumbing, painting, etc.). Hit "Search Contractors."
You'll see a list of contractors in that area. Each one shows:
- Their lead fee — what you'll earn if they accept
- Their trust signals — ratings, verification badges, transaction history
- Their close ratio — how often their accepted leads turn into actual jobs
🔑 Key Thing to Understand
The receiver sets the price— that's the lead fee you see next to each contractor. You're shopping around for who to sell your lead to. Pick someone who pays a fair fee AND seems like a good fit for the client.
3. Select a Contractor
Click on the contractor you want to send to. Don't just chase the highest fee — pick someone who'll actually do a good job for your client. Your reputation depends on it.
4. Choose the Contact Method
Two options:
- Contractor calls client(standard) — The contractor gets the client's info and reaches out. Most common.
- Client will call— You gave the client the contractor's number and they'll call when ready. Honor system — the contractor isn't auto-charged.
5. Enter Client Info
Fill in the client's details:
- Name
- Phone number
- Email (if you have it)
- Address or general area
6. Describe the Job
Pick the category, write a description, and add any notes. The more detail, the better. Compare these:
- ❌ "Needs painting"
- ✅ "Needs exterior painting, 2-story colonial, about 3,000 sq ft, looking to schedule within 2 weeks"
Which one would YOU rather receive?
7. Review and Send
You'll see a summary showing the contractor, client info, job details, and the fee you'll earn. Double-check everything and hit send.
What Happens After You Send
- The contractor gets an email and app notification
- They have 7 days to accept or reject
- If they accept, you earn the lead fee (held until your hold period ends, then paid out)
- If they reject, nothing happens — no charge, no penalty to you (unless it's a Category A rejection for bad lead quality)
- If they don't respond in 7 days, the lead auto-accepts and you get paid
⚠️ Duplicate Detection
You can't send the same phone number to multiple contractors within 24 hours. This keeps leads exclusive — one referral, one contractor.
💡 Pro Tips
- Include as much detail as possible. Job description, square footage, timeline, budget range — anything that helps the contractor qualify the lead before calling.
- Pick fit over fee. A contractor paying $50 who accepts 90% of leads is better than one paying $100 who rejects half. Rejections hurt your acceptance rate.
- Your first 5 leads are your audition. Send your best referrals early to build a strong acceptance rate and start climbing toward Verified status.
- Double-check the phone number. Wrong numbers are the #1 reason leads get disputed. Verify it before you hit send.